Docs / Administration
Roles & Permissions

We’ve added a Roles & Permissions system. Admins can now:
See all roles at a glance with user counts.
Create custom roles for different teams.
Set what each role can access — both whole app sections and specific actions.
What Are Roles?
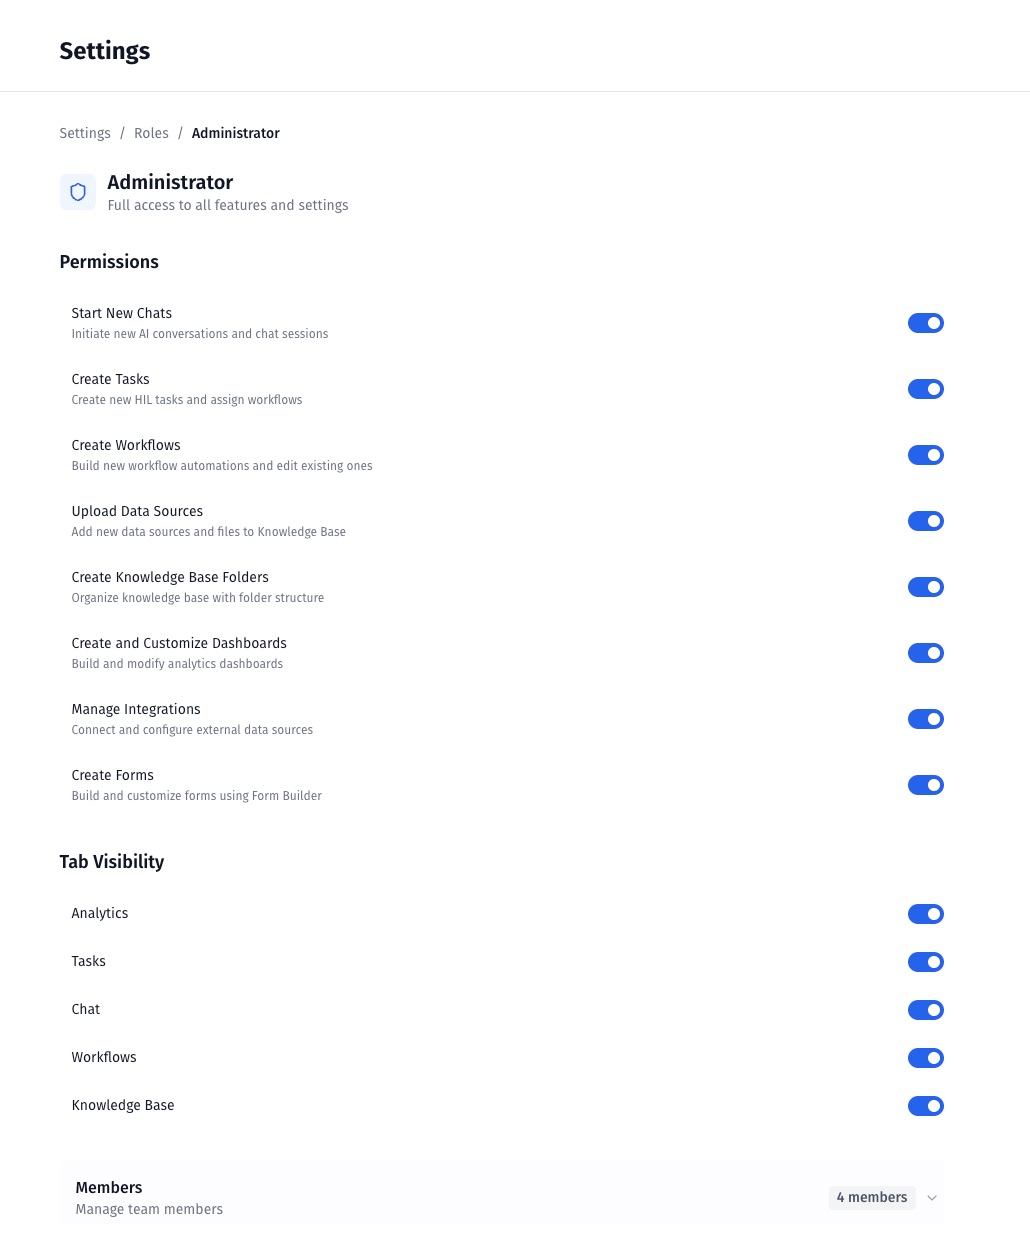
Each role defines:
What a user can do (like create tasks or upload files)
Which tabs they can see (like hiding the Knowledge Base tab for certain users)
You can assign users to a role depending on what they need access to.
Default Roles in MergePoint
Role | Description |
|---|---|
Administrator | Full access to everything — settings, data, automations |
Editor | Can create and edit content, but no access to system settings |
Viewer | Can see most features, but can’t edit or create anything |
Custom Roles | You can create your own (e.g. “Marketing Team”) |
How to Add or Edit a Role
Go to Settings > Roles
Click “+ Add Role”
Choose:
The permissions (what the role can do)
The tab visibility (what the role can see)
You can also click on any existing role to edit its permissions.
Available Permissions
You can allow or restrict actions like:
Starting new chats
Creating tasks
Building workflows
Uploading files / creating knowledge bases
Managing integrations
Building dashboards
Creating forms
Just tick the boxes to allow each action.
Tab Visibility
You can hide or show entire app sections depending on the user’s role:
Analytics
Tasks
Chat
Workflows
Knowledge Base
Each section has an on/off toggle. Turn off tabs you don’t want that role to see.
Deleting a Role
You can only delete roles that you’ve created (e.g. “Marketing Team”). Default roles like Administrator and Viewer can’t be deleted.
Example Use Cases
Internal Admins → Use the Administrator role
Marketing Users → Create a role with access only to Analytics and Chat
Contractors or Interns → Assign Viewer role to limit changes
Tips
Make roles as restrictive as needed, then expand as users request access.
Use custom roles to group people by department (e.g., “Finance”, “Product Team”).
If you accidentally lock someone out, an Administrator can restore access.
Was this helpful?